

Ever deep-fried something, only to realise the oil looks like muddy soup afterwards? I’ve been there—and learning how to filter oil from a deep fryer was a game-changer for my kitchen and my wallet. At first, I didn’t even know filtering fryer oil was a thing. But after a few burnt batches and weird-tasting fries, I got curious—and what I found made a big difference. In this guide, I’ll show you exactly what works, what to avoid, and why filtering deep fryer oil is one of the smartest cooking habits you can start today.
Why I Started Filtering My Deep Fryer Oil
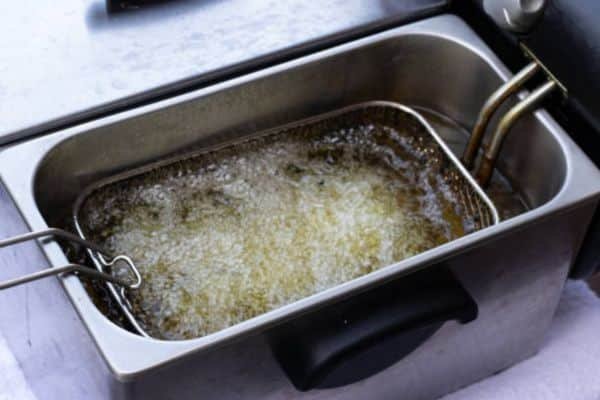
The first time I used a deep fryer, I was excited. But when I looked at the oil afterward, it was cloudy and smelled strange. Tiny burnt bits floated everywhere. I didn’t think it mattered. So I used that oil again.
Using unfiltered oil makes food taste bad and look greasy. My next batch of fries came out soft, oily, and off in flavor. I noticed the oil got darker and started to smoke faster. My kitchen smelled like burnt snacks.
That’s when I learned how to filter oil from a deep fryer the right way. I let it cool, strained it through a mesh, and stored it in a clean jar. The result? Crisp fries, no smoke, and better taste.
Filtered oil lasts longer and fries food better. It saves money too. I used to throw out oil after two uses. Now, I get up to five uses with clean, fresh results.
So yes, I always filter my fryer oil now. It’s a small step that brings big wins: better taste, less waste, and more value.
Why Filtering Fryer Oil Is Totally Worth It
At first, I wasn’t sure if filtering was worth the extra effort. But after trying it, the difference was clear—and not just in the oil.
Yes, filtering fryer oil is worth it. It helps your oil last longer, so you save money. Instead of tossing it after one or two uses, I now reuse it four or five times.
Filtered oil makes food taste better and smell fresh. No more weird odors or burnt flavors. My fries are crisp, not soggy. Chicken comes out golden, not greasy.
It also cuts down on smoke and leftover bits. Dirty oil smokes fast and leaves black specks on food. Filtering keeps your oil clean and smooth.
Clean oil is safer too. Old oil can break down and form harmful stuff. Filtering helps prevent that and keeps your meals healthier.
And here’s a bonus: it’s better for the planet. Less oil waste means fewer bottles tossed and less harm to drains or soil. I like knowing I’m helping in a small way.
How to Filter Oil from a Deep Fryer – Step-by-Step
Filtering oil might sound tricky, but it’s actually simple. Here’s how to filter oil from a deep fryer the right way, in just four easy steps.
What You’ll Need
Before you start, gather a few things:
- A heat-resistant container to hold the oil
- A fine mesh strainer or oil filter cone
- Cheesecloth or a coffee filter (optional, for extra clean oil)
- A funnel to avoid spills (optional)
- Heatproof gloves to stay safe
These tools make the job cleaner, safer, and faster.
Step 1 – Let the Oil Cool (But Not Harden)
After frying, turn off the fryer and wait. You want the oil warm, not hot. About 150°F is perfect—still liquid but safe to handle.
Letting the oil cool helps you filter it safely without burns or splashes. Don’t wait too long though. If it cools too much, it thickens and becomes harder to pour.
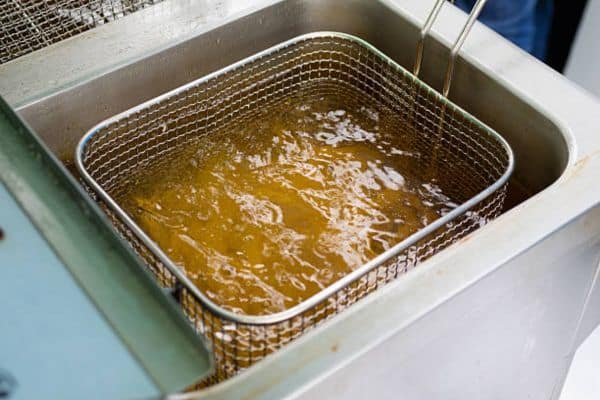
Step 2 – Remove Debris from the Fryer
Before pouring, get rid of the loose bits. Use a slotted spoon or skimmer to scoop out crumbs, batter flakes, and any burnt food.
Removing debris first makes filtering easier and keeps the oil cleaner. It’s a quick step that makes a big difference.
Step 3 – Strain the Oil
Put your strainer over the clean container. If you want super-clear oil, line the strainer with cheesecloth or a coffee filter. Then slowly pour the warm oil through it.
Straining removes tiny food bits and makes the oil safe to reuse. You can even filter it twice for extra clarity.
Tip: Use a funnel if your container has a narrow mouth. It keeps things neat.
Step 4 – Store Your Filtered Oil Properly
Once filtered, transfer the oil into a dark glass jar or stainless steel bottle. Avoid plastic—it can break down or absorb odours.
Label the jar with the type of oil and the date it was filtered.
Store your oil in a cool, dark place to keep it fresh longer. A pantry or cabinet works great. Avoid sunlight and heat.
Once your oil is filtered, keep your fryer spotless too. Read my simple guide on how to clean stuck-on grease from a deep fryer for an easy, eco-friendly clean-up.
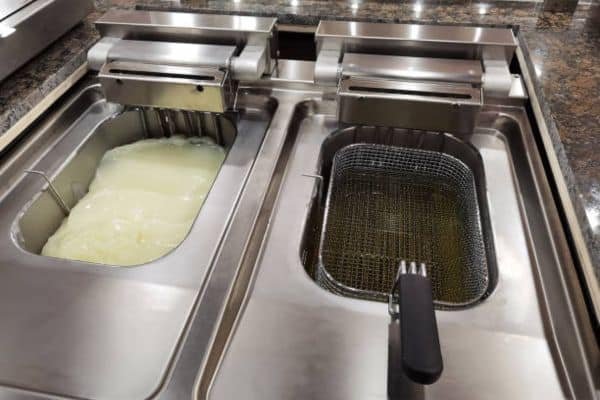
Bonus: Using a Deep Fryer with Oil Filtration System

Not a fan of filtering oil by hand? You’re not alone. That’s when I discovered the magic of a deep fryer with oil filtration built right in. It changed everything for me.
A deep fryer with oil filtration features an automatic oil filtration system that works while you cook or immediately after. It collects the used oil in a separate tank, removes food particles, and stores it for the next use. No pouring, no mess.
I’ve personally used models from T-fal and De’Longhi. Both work well, but I found T-fal’s oil box system easier to clean. You just pull out the drawer, and your clean oil is ready to go. It felt like having an extra set of hands in the kitchen.
Using a fryer with built-in filtration saves time and keeps your oil cleaner. You don’t need extra tools or containers. It’s fast, neat, and great if you fry often.
How Often Should You Filter or Change Fryer Oil?
Wondering how often to clean your oil? You’re not alone. Knowing when and how to filter oil from a deep fryer can save you from serving food that smells—or tastes—off.
For most home cooks, it’s best to filter the oil after every 1–2 uses. If you’re frying breaded or battered foods, even once might be enough. The cleaner the oil, the better your food will turn out.
Watch for warning signs: dark colour, strong smell, or smoking at lower heat. These mean the oil has broken down and needs to go. If it looks like cola or smells like burnt popcorn, it’s time.
Here’s a quick trick I use: keep a small note near the fryer and log each oil use. It helps me track how many times I’ve reused it, and I avoid guessing.
Filtering helps oil last longer, but knowing when to toss it keeps your food safe and tasty.
Common Mistakes to Avoid When Filtering Fryer Oil
Filtering oil sounds simple—but a few easy-to-make mistakes can ruin your efforts or even your oil.
Don’t filter when the oil is too hot or too cold. Hot oil can burn you or melt your tools. Cold oil gets thick and won’t strain well. Let it cool to a warm, safe temp—about 150°F is just right.
Always pre-strain before filtering. Skipping this step means crumbs can clog your strainer or filter paper. A quick scoop with a slotted spoon makes a big difference.
Avoid using plastic containers to store hot oil. Even heat-safe plastic can break down over time or absorb odours. Use glass or stainless steel instead.
Don’t reuse oil too many times. No matter how well you filter, oil breaks down. If it smells bad, smokes fast, or turns dark, it’s time to toss it.
Store oil in a cool, dark place. Heat and light speed up spoilage. A pantry shelf works great—just keep it away from the stove or window.
These small mistakes are easy to fix—and avoiding them keeps your oil clean, safe, and ready for your next fry.
My Top Tips for Longer-Lasting Frying Oil
Want to make your oil last longer? These small habits go a long way—and they’ve saved me both money and mess over time.
Start with a neutral oil that has a high smoke point. Oils like canola, peanut, or sunflower can handle heat better without breaking down. That means less smell, less smoke, and longer reuse.
Never overheat your oil. Stick to the right frying range—usually 350°F to 375°F. Too much heat burns food and ruins oil fast. Using a thermometer helps keep oil at the sweet spot.
Avoid frying wet or frozen food straight from the fridge. Water causes oil to splatter and degrade faster. Pat foods dry first—it makes frying safer and keeps your oil cleaner.
Skim the oil between batches. Use a slotted spoon or small strainer to scoop out crumbs. This keeps bits from burning and turning your oil dark.
FAQs
What is the best filter for fryer oil?
A fine mesh strainer lined with cheesecloth works great. For cleaner results, use a commercial oil filter cone if you have one.
How many times can you reuse fryer oil?
You can usually reuse fryer oil 3 to 5 times, depending on what you fry and how well you clean and store it.
Can I use a coffee filter to filter fryer oil?
Yes, you can. Coffee filters catch fine bits but work slowly. Use two filters for better results if the oil is very dirty.
What happens if I don’t filter oil?
Unfiltered oil breaks down fast. Food may taste burnt or greasy, and it’s less healthy to reuse oil that’s full of old crumbs and residue.
Final Thoughts
Filtering your fryer oil might feel like an extra step—but it’s one that pays off every time. Clean oil means better flavor, longer use, and less waste. You save money, your food tastes fresh, and your kitchen stays smoke-free.
Once I started filtering consistently, frying felt less messy—and a lot more rewarding. I stopped throwing out oil after one use, and my fries stopped tasting like last week’s chicken.