
I still remember the first time I cooked filet mignon at home. I was nervous but excited, holding two perfect cuts from the butcher. It felt like a special moment, and I didn’t want to mess it up. Over time, I learned simple techniques that work every time. In this guide, I’ll show you how to cook filet mignon in a non stick pan using easy steps anyone can follow. No fancy tools, no complicated tricks—just simple, stress-free cooking that delivers tender, juicy results right in your own kitchen.
Why Filet Mignon Deserves Special Attention
Filet mignon comes from the tenderloin, one of the softest parts of the cow. It’s known for its smooth texture and delicate flavor. Many people consider it a premium cut because it feels special and tastes rich without needing complex preparation.
This steak also cooks fast. Its lean structure allows heat to move through quickly, so you get perfect results in minutes. That makes it a great choice for beginners who want something impressive without long hours in the kitchen.
A non-stick pan makes the process simple. It helps the steak sear evenly and prevents sticking. It also uses less oil, keeping the flavor pure and natural. A good non-stick pan is versatile too. I use mine for filet mignon and quick breakfasts—it’s also one of the best small fry pans for eggs.
With the right pan and a little care, creating a tender, juicy filet mignon at home becomes easy and enjoyable.
Tools and Ingredients You’ll Need
Basic Ingredients
- Filet mignon steaks, about 1.5 inches thick
- Salt and freshly ground black pepper
- Olive oil or unsalted butter
- Garlic cloves, lightly smashed
- Fresh herbs like rosemary or thyme (optional)
Essential Tools
- A good-quality non-stick pan
- Tongs for gentle flipping
- Digital meat thermometer for perfect doneness
Step-by-Step Guide: How to Cook Filet Mignon in a Non Stick Pan
Cooking filet mignon sounds fancy, but it’s simple once you know the steps. With the right approach, you can make a steak that’s tender, juicy, and full of flavor. Follow this guide to create restaurant-quality results right in your kitchen.
Step 1 — Prep the Steaks

Start by taking the steaks out of the fridge about 30 minutes before cooking. This lets the meat warm slightly, so it cooks evenly from edge to centre.
Pat the steaks dry with a paper towel. Removing surface moisture is key for creating a golden, flavorful crust later. Place them on a clean plate while you get the pan ready.
Step 2 — Season Simply but Well
It is naturally tender and full of flavour, so it doesn’t need heavy seasoning. Sprinkle both sides with salt and freshly ground black pepper. Gently press the seasoning into the surface so it sticks.
For a little extra depth, add a light pinch of garlic powder, but avoid overdoing it. Keeping the flavours simple allows the quality of the meat to shine through.
Step 3 — Preheat Your Non-Stick Pan
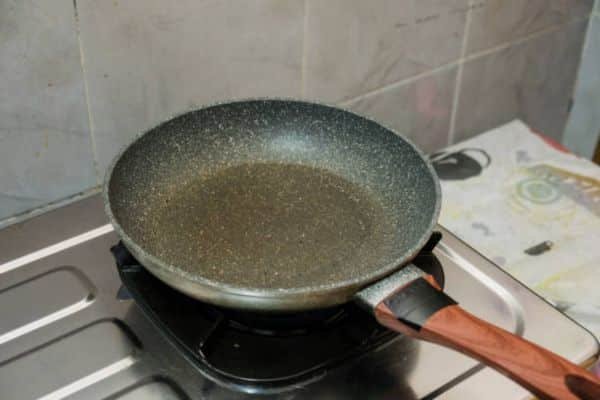
Place your non-stick pan over medium-high heat. Let it heat for about two to three minutes before adding anything. A hot pan ensures a proper sear and locks in flavor.
Once heated, add one to two tablespoons of olive oil, butter, or a mix of both. Oil handles high heat well, while butter adds a rich, nutty taste. I prefer combining the two for the best balance.
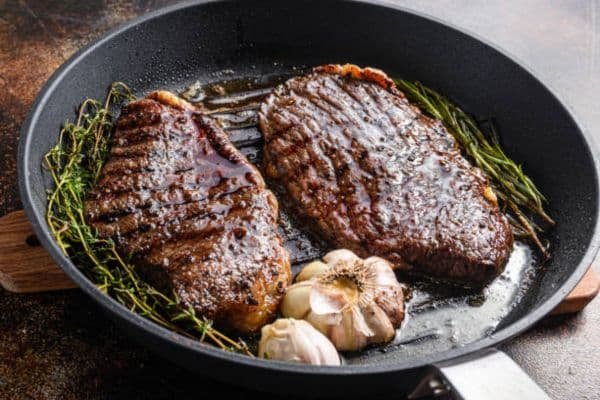
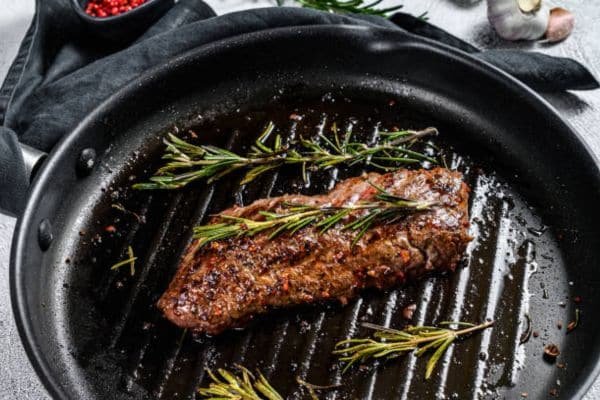
Step 4 — Sear to Perfection
Place the steaks gently in the hot pan using tongs. You should hear a strong sizzle the moment they touch the surface. That’s a sign the pan is hot enough to create a crust.
Leave the steaks untouched while searing the first side for 3–4 minutes. Flipping too early prevents caramelisation and affects flavour. Turn the steaks carefully and sear the other side for another 3–4 minutes.
Use a meat thermometer to check doneness:
- Rare: 120°F (48°C) — cool red center
- Medium-rare: 130°F (54°C) — warm red center
- Medium: 140°F (60°C) — warm pink center
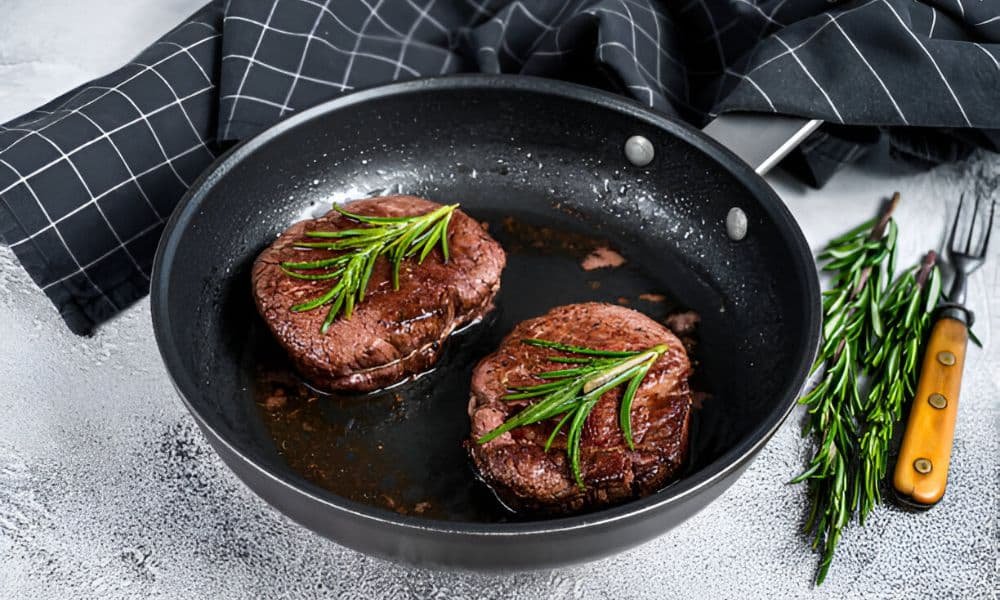
Step 5 — Butter-Basting for Flavor

Once the steaks are seared, lower the heat slightly. Add a tablespoon of butter, a couple of smashed garlic cloves, and a sprig of rosemary or thyme to the pan.
Tilt the pan slightly and use a spoon to scoop the melted butter over the steaks. Baste each side for about 30–40 seconds. This simple step adds richness and a glossy finish while infusing the meat with aroma.
Step 6 — Rest Before Serving
Transfer the steaks to a clean plate and let them rest for about 5 minutes. Resting allows the juices to redistribute through the meat, keeping it moist and tender.
Cover them loosely with foil during this time. Avoid cutting into the steak right away, as it can cause the juices to spill out.
Expert Tips for Perfect Results Every Time

Cooking at home can feel intimidating, but a few small tricks make a big difference. These tips come from years of practice and many experiments in the kitchen.
Use a Meat Thermometer
Guessing doneness leads to dry or undercooked steaks. A digital meat thermometer removes the guesswork. Insert it into the thickest part of the steak for an accurate reading. Medium-rare hits around 130°F (54°C), giving the perfect soft, juicy texture.
Pick the Right Thickness
Thicker cuts are easier to cook evenly. Steaks about 1.5 to 2 inches thick give you time to sear the crust without drying the center. Thinner cuts cook too fast and are easy to overdo.
Give the Pan Space
Avoid crowding the pan with too many steaks at once. Overcrowding traps steam and stops the crust from forming. Two steaks at a time work best, even in larger pans.
Control the Heat
Non-stick pans heat quickly, so balance is key. Start with medium-high heat for a strong sear, then lower slightly to finish cooking. This keeps the outside crisp while leaving the inside tender.
Add Butter at the Right Time
Butter burns quickly on high heat. Add it during the last minute of searing for richness without bitterness. Pair it with garlic and fresh herbs for extra flavor.
Common Mistakes to Avoid
Cooking at home feels simple, but small errors can affect flavor and texture. Knowing these common mistakes helps you get perfect results every time.
Overcooking the Steak
It is naturally lean, so cooking it too long makes it dry and chewy. Use a meat thermometer for accuracy instead of guessing. For the best balance of tenderness and flavor, aim for medium-rare at about 130°F (54°C).
Moving the Steak Too Much
Once the steak touches the pan, leave it alone to sear properly. Constant flipping prevents the crust from forming and reduces flavor. A single flip is enough for an even, golden sear.
Using Cold Steaks
Cold meat cooks unevenly. Take the steaks out of the fridge about 30 minutes before cooking. Allowing them to reach room temperature helps them cook more evenly and stay juicy.
Skipping the Resting Step
Resting keeps juices inside the steak. Cutting too soon causes moisture loss. Let the steaks rest for at least 5 minutes before slicing.
Choosing Poor-Quality Pans
Uneven heat leads to burnt spots and raw centres. A sturdy non-stick pan ensures consistent heat and helps you get that perfect sear.
Avoiding these mistakes guarantees tender, juicy, and flavorful filet mignon every time.
Serving Ideas and Side Pairings
A perfectly cooked pair well with simple sides that enhance its tender flavour. The aim is to balance richness with freshness for a complete meal.
Creamy mashed potatoes create a smooth, buttery contrast to the steak. Roasted asparagus, green beans, or sautéed spinach add colour and lightness. A fresh garden salad with a mild vinaigrette also works beautifully.
For extra depth, drizzle garlic herb butter or add mushroom sauce. Pair the dish with Cabernet Sauvignon, Pinot Noir, or sparkling water for an elegant finish.
Final Thoughts
Cooking filet mignon at home is simple with the right approach. A non-stick pan, a few ingredients, and proper timing are all you need for success.
Each time you cook, your skills improve. Confidence grows, and the process feels natural. A good pan makes it easier and keeps results consistent.
I still enjoy making this dish because it brings comfort and pride. You can do the same. With care and practice, your kitchen becomes the best place to enjoy a tender, flavorful steak.
FAQs
Can I cook filet mignon without a meat thermometer?
Yes. Look and touch can guide you. Rare feels soft, medium-rare feels springy, and medium feels firm. Cut the center only as a last check, since it can release juices.
How long should filet mignon rest?
About five minutes is best. This short pause keeps juices inside the meat. Cover loosely with foil to hold warmth.
Do I need to marinate filet mignon?
No. The cut is naturally tender. Simple seasoning with salt, pepper, butter, and herbs brings out the best flavor.