
The first time I tried to figure out how to clean my Chefman deep fryer, I made a greasy mess—and nearly ruined the heating element. If you’ve ever hesitated before scrubbing out sticky oil or wondered how do you clean a deep fryer without damaging it, you’re not alone. I’ve been there, and over time, I’ve learned what actually works—without harsh chemicals or stress. In this guide, I’ll walk you through exactly how to wash a deep fryer the right way, share the tips I wish I knew sooner, and answer common questions about how to use and clean a Chefman deep fryer. Stick with me—your fryer (and your next batch of fries) will thank you.
Know Your Chefman Deep Fryer Before You Clean
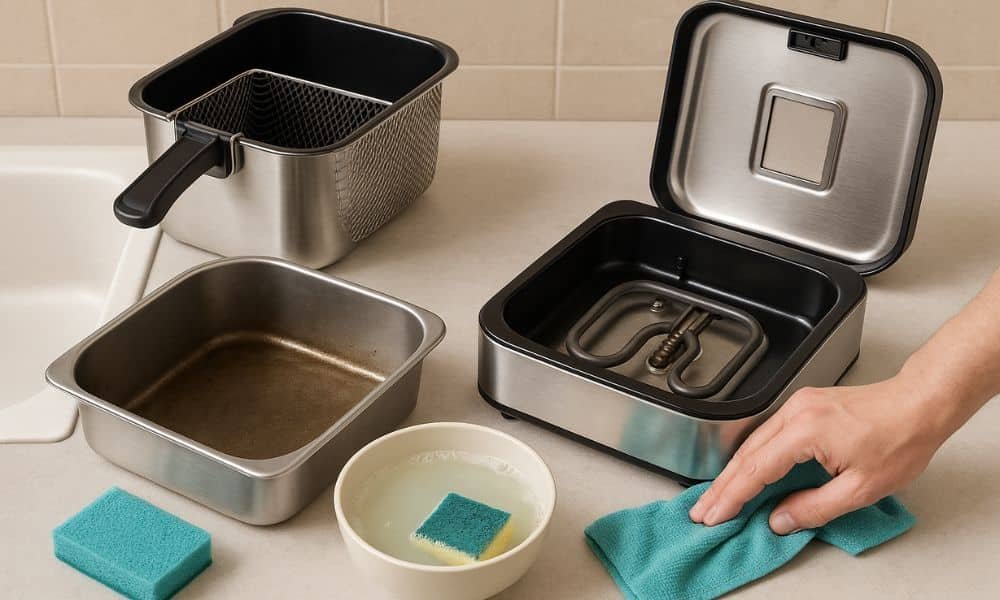
Before jumping into cleaning, it helps to really know your Chefman deep fryer. Whether you’re using a family-size 4.5L model or a compact one, they usually come with a removable frying basket, an oil container, a lid with a filter, and an electric base that houses the heating coil. The key thing to remember? The electric base should never be submerged in water—only the removable parts can be safely washed.
When I first used mine, I made the classic mistake of wiping it down too soon after unplugging. Rookie move. Always unplug the fryer and let it cool down completely—you should never clean your Chefman deep fryer while it’s still warm or plugged in, for safety reasons and to avoid electrical damage.
Also, understanding how to use a Chefman deep fryer helps you clean it better too. For example, if you know how to lift out the oil container correctly or how the filter lid works, you’ll avoid unnecessary spills or breakage. It’s a small thing, but using the fryer properly makes the cleanup easier later—and keeps the fryer in great shape longer.
How to Clean Chefman Deep Fryer – Step-by-Step
Cleaning your Chefman deep fryer doesn’t have to be overwhelming. Follow these simple steps, and you’ll keep your fryer running like new—no stress, no sticky mess.
Step 1: Unplug and Disassemble
Always start by unplugging the fryer and letting it cool completely. Seriously—don’t rush this. I once touched the heating coil too soon and instantly regretted it.
Once it’s cool, take everything apart: remove the frying basket, lift out the oil container, and take off the lid and filter if your model has one. Every removable piece will make cleaning easier and safer—just don’t forget which part goes where when it’s time to reassemble!
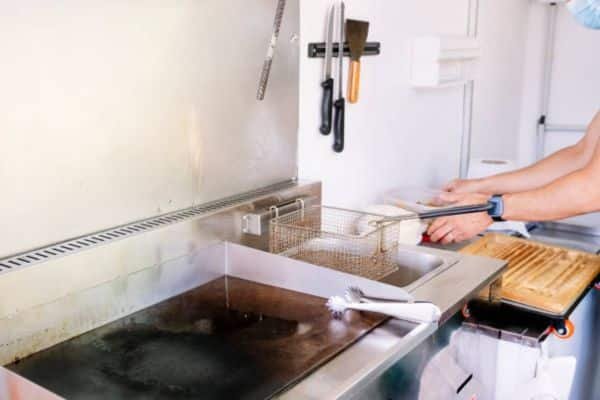
Step 2: Discard Old Oil Safely
This step is crucial. Never pour old fryer oil down the sink—it clogs pipes and damages plumbing. The best way to get rid of old oil is to pour it into a sealed container (like the bottle it came in) and toss it in the trash.
If the oil is still good, strain it through cheesecloth or a fine sieve and store it for reuse. Just make sure it hasn’t picked up any burnt bits or smells funky.
Step 3: Pre-Wash with Paper Towels

Before hitting the sink, I always give the inside of the fryer a good wipe-down with paper towels. It’s a simple step, but it makes a huge difference. Removing that thick, greasy layer first helps you avoid turning your sink into an oil slick.
Think of it like scraping your plate before washing—it’s just cleaner and easier.
Step 4: Soak Removable Parts
Fill your sink or a large tub with hot water, add a few drops of dish soap, and toss in about a cup of white vinegar. Then place the oil container, lid, and basket in for a soak—let them sit for at least 15–20 minutes to loosen up the grime.
This method is my go-to for natural cleaning. It’s safe, chemical-free, and it works like magic. If you’ve ever Googled how to wash a deep fryer, this is one of the safest and most effective ways.
Step 5: Scrub Gently with Soft Brush or Sponge
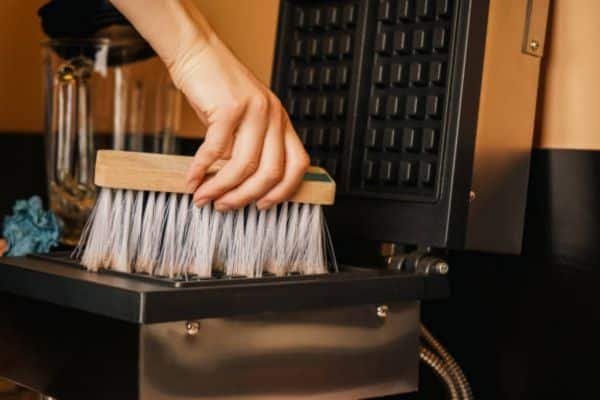
After soaking, use a soft sponge or brush to gently scrub the surfaces. For any stubborn grease, make a quick baking soda paste (just water + baking soda) and apply it directly to the area.
Avoid using steel wool or anything too abrasive—it can scratch the non-stick coating and shorten the life of your fryer. Gentle is key here.
Step 6: Clean Heating Element Area Carefully
Now for the tricky part: cleaning the base with the heating element.
You should never submerge this part in water—instead, take a damp microfiber cloth and carefully wipe around the surface. If there’s any caked-on oil, use a little vinegar on the cloth and go slow.
This is where people often ask, how do you clean a deep fryer without damaging the base? The answer is: spot clean with care and never get the wires or connectors wet.
Step 7: Rinse, Dry, and Reassemble
Once everything’s scrubbed and fresh, rinse the parts under clean water and air dry them completely. I usually leave them on a dish rack for an hour or so to make sure no moisture lingers—because the last thing you want is water in hot oil.
Before putting it back together, I give everything a final wipe with a clean microfiber cloth. It leaves the fryer looking brand new—and honestly, there’s something satisfying about seeing it shine.
My Personal Tips for Keeping It Clean Longer

After months of frying everything from crispy chicken wings to battered veggies, I’ve picked up a few tricks that help keep my Chefman deep fryer clean without needing a full scrub every time. Think of these as little habits that save you big cleaning headaches down the line.
One of the easiest things you can do is use the lid or a splatter screen every time you fry. I learned this the hard way when my kitchen walls started looking like a Jackson Pollock painting in oil. The lid helps contain splashes, and it keeps the heating element from getting coated in grease too quickly.
Another game-changer? Strain the oil after each use. I use a metal mesh strainer lined with cheesecloth to catch crumbs and food bits. Not only does this make the oil last longer, but it also prevents burned debris from sticking to the bottom next time you heat it up.
And finally, make quick wipe-downs your best friend. Once the fryer cools off, I take a paper towel and gently clean any splashes around the outer surface or handle area.
f you also own a deep fryer, check out my step-by-step guide on How to Clean a Deep Fryer with Vinegar for safe, natural cleaning tips.
How Often Should You Clean a Chefman Deep Fryer?
This is one of the questions I get the most—and honestly, the answer depends on how often (and what) you’re frying. I’ve gone through phases where I barely touched mine, and others where it lived on my counter full-time. Let me break it down simply.
If you’re using your Chefman deep fryer occasionally—say, once a week for fries or snacks—you can clean it every 3–4 uses. Just make sure to strain the oil and wipe the outside after each use to keep things manageable.
Now, if you’re cooking heavier items like fried chicken or battered fish, it’s a different story. These foods leave behind more crumbs and stronger smells, so it’s best to clean the fryer thoroughly after every single use. Trust me, you’ll thank yourself later.
And here’s a rule I stick to no matter what: do a full deep clean once a month if the fryer gets regular weekly use. That means soaking all the removable parts, wiping down the base, and giving it a proper refresh.
FAQs
Can I put Chefman deep fryer parts in the dishwasher?
Some parts like the basket and oil container may be dishwasher-safe, but always check your model’s manual first to avoid damaging them.
What’s the best degreaser for a deep fryer?
A paste made from baking soda and water, paired with white vinegar, works great as a natural, food-safe degreaser.
How do I clean the outside of my Chefman fryer?
Use a damp microfiber cloth with mild dish soap—don’t spray directly or use harsh cleaners that can damage the surface.
Is it okay to reuse oil in the Chefman fryer?
Yes, as long as you strain it after each use and store it in a cool, dark place; just don’t reuse oil that smells off or looks cloudy.
Final Thoughts
At the end of the day, keeping your Chefman deep fryer clean isn’t just about looks—it’s about flavor, safety, and getting the most out of your appliance. A clean fryer means crispier fries, fewer weird smells, and way less risk of burnt oil or electrical issues.
I get it—the first deep clean feels like a hassle. Grease, parts everywhere, and the fear of ruining something. But trust me, once you’ve done it once, it’s easier every time after. You’ll get faster, neater, and way more confident.
So here’s my challenge to you: try my method this weekend. Use the vinegar soak, the baking soda scrub, and those quick post-fry wipe-downs.